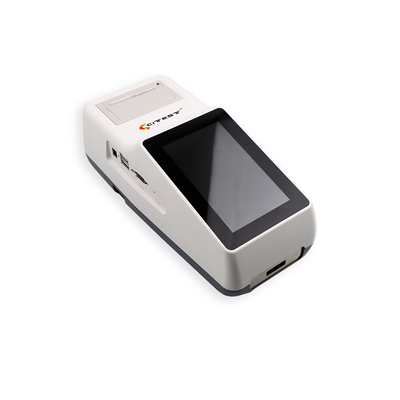
Fluorescence Immunoassay Analyzer (Handheld)
Application
Fluorescence Immunoassay Analyzer is an analyzer that based on detection of fluorescence emitted during an immunoassay with antigen-antibody interaction. The analyzer is designed to be used for quantitative or qualitative detection of human samples with specific in vitro diagnostic test units including Inflammation Markers, Tumor Markers, Nephrology, Diabetes, Cardiac Markers, Coagulation, Endocrinology, Autoimmunity, Infectious Diseases and etc. Fluorescence Immunoassay Analyzer offers the advantages of high accuracy, strong stability and fast results. Fluorescence Immunoassay Analyzer should only be used with in vitro diagnostic tests manufactured by CITEST. as per package insert provided with specific test kits.
For professional and Point of Care in vitro diagnostic use only.
Scope of Application
Fluorescence Immunoassay Analyzer works with certain fluorescent reagents. It’s for professional in vitro diagnostic and Point of Care Use. It may be used in central laboratories of medical institutions, outpatient or emergency departments, clinical departments or medical services (such as community health centers), or medical center, etc. It can also be used in researchlaboratories
Technical Specifications
| Test Method: |
Fluorescence Immunoassay |
| Test Format: |
Cassette |
| Measurement: |
Quantitative, Qualitative |
| Read Time: |
< 20 Seconds |
| Display: |
8000 Records |
| Memory: |
DC 15V,AC 100-240V 50/60Hz |
| Power Source: |
Rechargeable Li-ion |
| Built- in Battery: |
battery(3300mAh*3) |
| Storage Condition: |
-10-40℃,RH:20-90%, 86-106kPa |
| Printer: |
Built-in thermal printer |
| Connectivity: |
USB port, RS232 COM port, WIFI |
| Compatibility: |
LIS |
| Dimensions(L*W*H): |
270*127*115mm |
| Weight: |
<1.2kg |
Directions for Use
The Fluorescence Immunoassay Analyzer can be operated by commands on touchscreen.
1 System Installation
1) Connect power with analyzer through the DC adapter, press the power switch to turn on the analyzer.
2) After starting the analyzer, the initializing screen will display.
Note: If the initializing failed, it is recommended to contact the manufacturer or the local distributor.
3) After initializing, the main interface will display.
This is the main operation interface of the analyzer. Here you can choose the Test, Test Items, History and Settings
2 Settings
Tap "Settings" to display the secondary menu in the interface. System Settings
1) Tap "Time" to enter the year, month, day, hour, minute, second and tap "Set" to modify the system time. Tap "Time zone" to adjust the UTC time.
2) Tap "Language" to select the corresponding language, and tap "OK" to switch the system language.
3) Tap "Net Set" to enter the interface. and tap "WiFi" to enter the interface below for wifi settings. Tap the "WLAN Switch" and choose the WLAN you need in the "Valid WLAN list". Then enter the password.
4) Tap "Port Set" to enter the interface.
Generally the default serial port is connected to the LIS. If it is used to connect to a scanner or PC, leave LIS port unchecked and then check the appropriate option.
5) Tap "Backlight" to adjust the brightness of the display. Tap "LIGHTEN" or "DIM" to adjust the screen brightness.
6) Tap "About" to enter the interface for more information related to the analyzer. The Software Version and Serial Number are displayed on the
screen.
Maintenance
Basic maintenance is to keep the outside of the Fluorescence Immunoassay Analyzer clean.
External cleaning and maintenance method: Clean the outer surface of the analyzer with a damp cloth with no more than 70% alcohol. Do not use strong bleach (≥ 0.5% bleach solution), because oxidizing substances and solvents may damage the parts of analyzer and touch screen. Do not clean any internal parts and inner surface.

